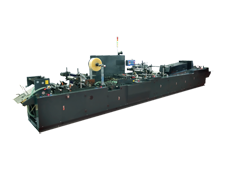
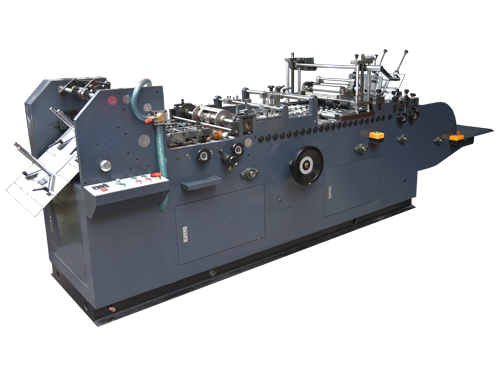
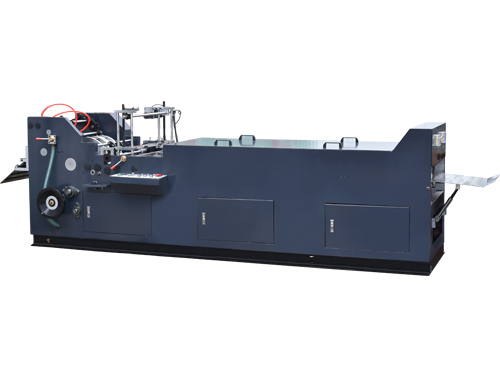
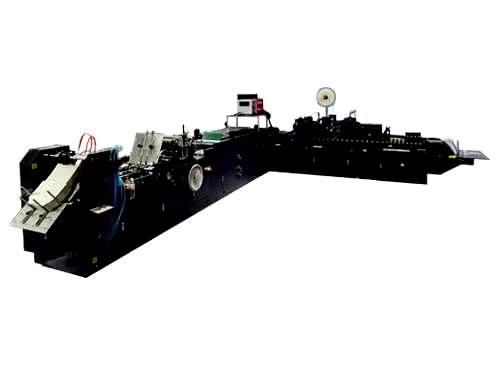
This week has seen more weird Google Voice transcriptions than usual. Not that there isn’t usually a word that gets bunged up here and there, but I normally get the jist of what’s going on. Not so much with these. It’s like a new kind of found poetry based on mangled transcriptions. Or maybe song lyrics. There is something about the transcript that reminds me of Laurie Anderson. I’m calling it Google-Ku:
Hey sweetie, it’s me.
I was just calling to check it out.
I left something to me so that
I haven’t actually spoken to the car
drive but I think that
order the wrong part
and I think they’re going to
need to keep the car because
I don’t. I don’t know
if I’m about to much more.
So I’m just gonna go ahead
and tell them to do that.
I will talk to yeah
i think i think anyway,
so the biggest thing is i’m i’m.
I need you to pick me up a train station
and here bye
My Sweetie left that one, and this one too (I may have tried to hard to keep everything from the transcript on this one):
Hey it’s me.
Hey, it’s me.
I was just on
the first time
today at 850
hi and I
don’t answer if
you’re still taking
a plan and to see
if you want me
to have it here,
trying to get some. L.
Hey, it’s not
what I’ll do
is ask you.
I mean, I love you.
Have you seen any odd poetry in your voice transcriptions?
Luke’s nursery school has a Luau for their end of year party. Everyone dresses in Hawaiian shirts, leis, sunglasses, and the school gets decorated for the party. I decided to make Luke a Hawaiian shirt for the party. I have a nice pink flamingo on green fabric I thought would be perfect, but Luke insisted on the froggie print instead. Off to the store for a pattern we went. While Luke flirted with a nice woman at the catalog table, I picked out Simplicity 3852 for the project. We tried to find some nice frog or lilly pad buttons, but there were none. Luke howled at the idea of plain old round buttons and picked out the fish buttons.
I’m starting to realize that the reason it takes me so long to start projects is I hate cutting everything out. It’s kind of important to cut things out if you want to make them, so I need to get over that. Looking back I see that it’s not the cutting that I hate, it’s not the layout work that I hate, it’s cutting with the pattern pinned to the fabric. I find it tedious, hard to work curves and corners and I’m never really happy with the results (apparently, I’m on the right track here too…). Anyway…
I got everything cut out and marked without too much drama, just the usual sloppiness and I opted to mark with tailor tacks this time (an experiment, still not sure how I felt about it, will probably try them again to see). The yoke, front and back went together very easy. I slopped up the staystiching around the collar though. I thought it would be covered when I attached the collar, but was wrong. Fortunately when the collar is folded over it hides the mess. I ditched the pocket (much to Luke’s dismay) because I don’t like pockets on this style shirt.
I had a little trouble with the collar. It didn’t seem to match up correctly to the rest of the shirt the way I stitched it together. If you look closely at the collar you can see a line of stitches coming out of the neckline. It’s pretty well matched on both sides, so I will call it a design accent. The front was sloppy as well (curves around the buttons) and the sleeves were too big, so I decided to pin and trim instead of easing them in. All of these problems seem to tie back to my sloppy cutting. I can save most anything on the machine bed, but I would rather not have to. My next mission is to clean up my cutting techniques. The only other mod was going with a shorter hem to get a better length out of the shirt.
I had some major machine problems that started during the button holes. First a thread jam that left a lump and a gap. I had to clean it up with some hand satin stitching. Then I had a nasty thread jam in the shuttle and was so tired when I put it back together I messed up one of the pieces. Then instead of doing the lockstitch it was doing the wobbly hook vs needle slamdance. I had stuck with the portable because it was already tensioned for this project, but this was the last straw. I pulled the thread, bobbin and needle, ran over to the 31-15, threaded it up, adjusted the tension and fired off the bottom hems in a flash. 
I really like my portable for double needle work and blind hemming, but I have to give up on using it for button hole work. I got a button hole attachment with the 31-15, I’m going to have to learn how to use it now. The horizontal button holes worked perfectly with the wacky fish buttons.
I managed to finish it in time for the big party, granted I was sewing buttons on while he was taking a bath, but we made it to school on time and looking sharp. Luke is very happy with it (which is all that really matters) and loves telling people I made it for him. I’ve gotten quite a few compliments, and some outright disbelief, so it was a win project for me too!
Cutting is often the hardest part of a sewing project. Does anyone have some tips on easier and more accurate cutting?
But first a rant of sorts. I’m broken on holiday gifts. I really don’t want some lavish showoff gift from a store. Especially for something like Father’s Day. Frankly, if I want an ipod, I’ll buy one. (It makes even less sense when presents like this come out of the mixed funds of marriage, trust me, been there). A handmade personal gift is gold to me. Luke came home with a picture frame he made and decorated in nursery school with his picture in it. Love it! (I still have the one Jack made his last year there) Jack came home with a card he made himself. Gold!
This year when Mother’s Day rolled around I wanted to kick off things with a better gift for my Mom. Busy as I was I didn’t have time to do something from scratch, but I had a pencil drawing in one of my sketchbooks I knew she would like. A quick trip to the craft store for a frame, and a gift with a real personal touch was born. She loved it. And I can tell the difference between the always upbeat “oh I love it” and the real thing (just don’t tell Mom I know).
For Father’s Day this year I decided to put my newly acquired embroidery skills to the test and make Dad something nice. Fortunately, the folks weren’t going to be home until evening, so I had even more time to complete the project.
For this gift I decided to use one of the tea towels included with the stitch-it kit. Dad is an antique clock fixin’ maniac. I wanted to do something with a clock theme. I looked through the iron-on transfers included, but there weren’t any clock ones. To the Interwebs! I found a nice abstraction of a grandfather clock and printed that out.
But without iron-on power, what was I to do? Well, turned out it was pretty simple. I placed the towel over the printout and it showed through nicely. I grabbed my water soluble marker (the regular sewing kind for pattern marks) and traced the image. Then I found a nice leaf and branch design in the stitch-it kit transfers and copied that the same way, but left the leaves off. Then I found out that there wasn’t a mirror image on the transfer. D’oh! I thought there was, but I WAS WRONG! Oh well, I have a light box. I folded it in half and traced the image on the back of the towel. It showed through enough that I could follow it on the front (if I didn’t have a light box, I would have taped it to a sunny window and traced it over there). The marker bled miserably, but was good enough to stitch on (a light quick stroke turned out to be the key).
I spent a good chunk of the day stitching away, doing my best to not wreck it when I screwed up. I only had to cut away a pile of stitches once and undo a few bunged ones 3 or 4 times. I think I spent about six hours on it, a fair chunk of that was refereeing the daylong wrestling match between the kids, but if it were a project for work, I would have billed six hours.
After I finished stitching, and stretched my eyes, I went to the sink to rinse out the marker. Suddenly I realized I hadn’t tested the marker on this fabric. It’s just cotton, it should wash right out. But it’s white and it soaked the marker up like crazy when I was doing the layout. My panic was for nothing, it all came out, but it serves as a reminder to test that stuff first! Instead of wringing it out, I put it between towels and hit it with a dry iron, shifting the towels a few times until it was dry. I ironed it, folded it (realized I had nothing to wrap it in) piled the kids in the truck and was off.
I think Dad didn’t realize I made it myself at first, because he just gave the “this is nice” smile. Until my mom was looking at it and asked if I did it by hand or machine. After I gave the “by hand of course!” I caught my Dad looking at it a couple more times and I got the sincere “It’s really nice” later. Score!
How soon after learning a new skill do you feel comfortable making a gift using that skill?
Have I ever mentioned I am a voracious book consumer? No? Well, I am. I love books. When I’m in the library I want to hug the shelves. I acquired this reverence for books from my Grandmother, the librarian. She was a book hound. After she died, in an effort to clear the house of her bibliographic legacy, my parents resorted to selling books by the foot to people who wanted filler for their libraries (mon dieu!). It’s only in the past few years that I’ve even dared to write in my own books (sacre bleu!) and become comfortable with that as an acceptable practice.
This is relevant, trust me. Being that I love buying books, I figure I can share the love with some reviews. Before I buy any book online, I read any available reviews on Amazon and use my gut to decide how each one weighs on my purchase. I especially love reviews by people with a certain amount of credibility, or at least decent logic to their review writing. Sadly, I will offer none of that in my reviews, just observation, opinion and how I feel after field testing the material. Now that you’ve been warned, to the first review!
I have long wanted to try embroidery. I appreciate the wonderful work that so many people create with cross-stitch, my ex created some very nice pieces over the years, but straight up hand embroidery always appealed more to my tastes. With that in mind, I started searching the net for embroidery tutorials. There is a plethora of good and interesting stuff out there, but I was feeling a little overwhelmed. Where exactly to start? Could somebody please hold my hand and help me out a little? I saw quite a few references to Sublime Stitching and specifically Jenny Hart’s stitch-it kit. Some reviews panned it as simplistic, but that’s what I needed. So, I ordered it.
First glance when I received it, I thought “Wow, what a nice box”. Then I was somewhat underwhelmed by the contents: A booklet, seven skeins of floss, two tea-towels, a needle, a small hoop, and a pile of iron on transfers. I had to remind myself that the whole reason I bought this was simplicity. I had hoops, needles, skeins up the wazoo and had done nothing. It was time to silence the critic until everything was read and tried.
I cleared my mind of preconceived criticisms, picked up the 48 page book and started reading. Jenny takes us through the undeniable coolness of embroidery and talks about the mistakes beginning stitchers make (like buying the encyclopaedia stichtannica and becoming overwhelmed in minutea). She has a friendly writing style that makes for quick and easily digested reading. From the introduction she takes us into an overview of the tools and then right into getting started. The stitch diagrams cover 9 different stitches (two are variations) and there are helpful hints all over the place. The stitch diagrams are well illustrated and easy to follow. There are a handful of color plates in the book as well, which I found got me excited to try my first stitches.
I picked up a couple of flour bag towels at the grocery store for practice fodder. I figured I would be more inclined to just go for it and not worry about mistakes instead of starting with the enclosed tea towels. Does that somewhat defeat the purpose of the tea towels? Yes. Am I more than just a little bit mental. Yes, but my mommy says it’s ok that I’m different and girls find quirkiness appealing. The one thing you will definitely need that isn’t included, are scissors. Nothing special required, I used my regular $1.99 whatever pair at first.
My first efforts were less than stellar. I started by picking out a bunch of the transfers I liked and ironing them on the towel with some decent space in between. I hooped it up and started with a sparkle pattern. I made some messes, some knots, tried using three strands instead of all six and then practiced some straight lines in different stitches.
In retrospect, using the flour bag towels was a mistake, they are woven a little loose and now that I’ve used one of the tea towels, I recommend sticking with what is in the kit at first.
After farting around for a while and getting the knack of the split stitch, back stitch and stem stitch, I hooped up the pineapple transfer and got to work. This time it was magical. I was stitching with more confidence and seeing immediate results. I had to refer back to the book a few times for help and motivation, but after a while I had a good start to the pineapple. I packed up my stuff in a ziplock bag, jumped on the motorcycle and headed down to NJ for some quality time with my sweetheart. While she wrote her blog post for the next day, I sat on the couch next to her and finished up the body of the pineapple. The wonderful promise of embroidery had been attained! Quiet soothing creativity practiced in close quarters to a loved one. Chock full of awesome!
I’ll stop waxing philosophic about playing footsie and stitching at the same time and leave it at this: For twenty three bucks I got enough material and knowledge to kickstart a soon-to-be addiction. The kit may seem simplistic and somewhat underwhelming at first, but there is goodness within. I highly recommend this to anyone as a springboard into embroidery and will likely be buying this again for some younger relatives.
Now, a note of caution. If you already have Jenny’s Sublime Stitching book, you will find the stitch-it kit book to be an edited down version of the same. By the same token, if you already have floss, hoops and needles, you may just want to skip the kit and go directly for the Sublime Stitching book.
Overall I am very pleased and have since created a nice Father’s Day gift using one of the tea towels, but more on that next week…
Do you have the stitch-it kit? Tell us if you liked it or not.
With the arrival of my Bitchin’ New Stitchrig, setting up a sewing room became a crisis project. I’ve been in perpetual moving motion since I got the new house back in February. My front room became a complete disaster. It had moved from being a staging area for boxes, to a “please excuse this room” when people walked in.
Originally, I was going to set up a sitting room. Put a comfy couch in the window nook and some elegant chairs around the fireplace. My office upstairs would most likely double as a sewing room under that plan. As I was driving back with that monster machine table in the back of my truck I realized two things. 1) The office wasn’t big enough to be an office and a sewing room 2) I just promised myself I would kick my sewing up a couple notches to justify the new machine 3) I really didn’t want to carry that heavy bitch upstairs 4) What did I really need a sitting room for when I had a living room and was planning a playroom / tv room upstairs? That’s four, who’s counting anyway? Sitting room out, Sewing room in.
The first job was to unjunk the room. The picture tells the tale, it was a disaster. And that was after cleaning for a couple hours! I almost killed myself trying to get the table in around all that junk. Swearing and throwing empty boxes was involved.
I managed to get everything cleaned up in time for my sweetie to arrive for date night (though I still needed a shower). It is much easier to get things done when you are trying to impress your partner. The clean room percolated in my brain overnight and I came up with a rough plan for what the room should look like. One thing I should really mention here is any workspace plan has to be considered a starting point. The only way I can get things done is to just stop thinking about it and go with what feels right at the moment. With the complete understanding that I will be revamping it later as I work in the room and figure out what I hate.
The next step was to bring in some workspace. My drafting table came out of the office. It is good for drafting, drawing, cutting smaller pattern pieces, general workspace and can double as a sewing table for the portable. One of the chairs that came with the kitchen table paired up nicely. I put my trusty oak chair in front of the Singer (now I’ll need something new for my office, which isn’t set up, so I have time to think about it).
For storage and reference, I started with a bookcase which had been holding crap in my old basement. Turned out it needed a little bath and some time in the sun to get rid of the mildew that had accumulated in the old basement. I set that in place and went right to work stocking the shelves with my vast library of sewing reference material… Wow, sure seemed like I had a lot more books to go here. This is great though, because I had been beating myself up for buying too many sewing books over the years and not sewing enough to justify it!
The next step was to improve the lighting. Up until a few days ago I only had one working bulb in the room and it finally burned out. I figured this was the perfect opportunity to try out some of those dimmer compatible CFLs. Off to the local mega home store I go. Disaster struck almost immediately. I walk in and discover they’ve moved the lightbulb section away from the front door. As I was walking down the aisle in confusion I was sucked into the evil vortex of the home organization section. Almost instantly my hands were full of cute little bins and a hanging sweater rack. I dropped everything and went to the front of the store to get a cart. My hands on the cart I realized this was my only chance, run now, don’t look back, get away! But I was lost to the siren song of a rolling garment rack with shelves. A collapsible shelf drawer and a canvas rack cover later I was done and looking for the CFLs again, feeling like a weak, impulsive, money hemorrhaging failure.
Back home, it was a blur of assembly and organization. Lo and behold, my failure to control my impulsive buying became an epic win. The garment rack has space to store my UFOs, the hanging sweater rack holds folded fabric for the next projects, the folding drawer is perfect for storing patterns, and the cute little bins transformed my empty bookcase into a stylish organizer. The vision that inspired my feeding frenzy in the home organization section was realized!
Now that I’ve been using the room for a couple weeks there are a few tweaks needed. Number one on my list is to replace all the outlets in the room. They are all shot. Plugs are loose, don’t make connections, and they look like hell. I can’t figure out what kind of fat plugs the old owners must have been using on a daily basis to wear them out. I also started hanging my cutting mats on the wall on a picture hanger. This works much better than them curling over and getting in the way behind the drafting table.
My ironing board seems to have taken up residence under the window and I’ll need to work out something better. My beloved super heavy iron took a tumble off the board yesterday. And while I am quite happy I got my foot out of the way and the iron didn’t even get a scratch, it put a humungous gouge in the floor when it hit (I would be in a cast right now if that had hit my bare foot). I need a small table and a cord keeper to make things better / safer. I also need to make a rectangular ironing board topper for ironing prewashed fabric before layout. I smell a project coming on…
The drafting table doubling as a sewing table for the portable has worked so far, but I’m not really happy with it. I got dibs on a small desk in my parents old house that will go under the window where I iron now. Where will I iron then? Good question. I guess it will become the impetus for folding up the ironing board on occasion.
On the whole I am ecstatic about how the room came out. It invites me to spend time in it. The kitchen table is free for use as a kitchen table again! And it had been met with admiration and pure green envy by visitors (*Sooo* much better than the cringe and “please excuse the mess” that came before). That’s it, “I have been officially pimped!”
P.S. Yes, that is a new dress form. And yes, I will be reviewing it (and most likely modifying it) shortly!
Gentle Reader, please accept my humble apologies for taking a month between posts. I have much to talk about from the past month. First up, my “new” sewing machine!
This is a 1930 Singer 31-15 I found on eBay. It was a pickup only item somewhere in PA. I figured I’d bid, but lose. I always lose on eBay (Buy It Now, you’re my bestest friend). As it was coming to a close, I started getting buyer’s jitters. “What the heck do I need another machine for? I have no room for it. I haven’t even set up a sewing room in the new house! I’ve been working on the kitchen table for months!” (which as a side note, is the most awesome layout and cut table ever! Mostly due to it’s height). I, of course, won.
Well, cup of coffee in hand I jumped in the truck for the ride out to PA. A beautiful spring day, $140 in my pocket and a “oh well, whatever” attitude for the ride. Wouldn’t you know that this baby was in top condition. Yeah, it’s got some cosmetic wear on it (it’s older than my dad! Sorry Dad, you’re in great shape for your age too!) but mechanically cherry. 
When I bid on it, I thought it was a treadle setup, mostly because it was listed that way. I liked the idea of having complete control over every stitch. I’ve (more than once) done complete sections of work just hand cranking the machine. Let’s face it, my portable machine sucks for low speed work. The motor buzzes and hums and refuses to take off. Give it a little nudge and then it’s flying like a drunk on a superbike. Very frustrating. When I got there, the 31-15 turned out to have a clutch motor on it. Oh dear!
Well, he fired it up and ran some fabric through it and I almost fell over. This thing was a monster! I’ve since found that the control I get with the clutch motor is incredible. The downside, of course there is a downside, is the motor is always running. But, I am pretty well organized so that when I start stitching, I have everything ready to go. So it’s motor on (yes, I almost always say “power on the reactor” out loud, such a nerd) do the work, motor off.
As we were loading it into my truck, the sun hit the cast iron legs on the table. The gold paint highlighting the Singer name and logo was mostly intact, and frankly quite beautiful. Not only is it a workhorse, but it is quite easy on the eyes. I was elated on the ride home, what a score! 
The machine did have a minor flaw. Someone had spliced in a lamp cord to the light on the machine head. They didn’t do so hot a job and it came loose between transport and setup. I plugged it in and was greeted by arcing and smoke. D’oh! I decided against rewiring that little disaster and added a clip on LED light on a gooseneck from IKEA. Par-Fection!
Once I was on the way home the big question of this great find was where to put it. I decided to turn my front room into a sewing room instead of a sitting parlor on the ride back. At this point it was just a pile of boxes needing to be put away. After lugging the monster up the front steps and over the boxes into it’s final resting place, the next project had begun. But more on that in the next post…
But you are supposed to slack on vacation! Unfortunately my original plan of having a weeks worth of posts in the can and scheduled was a pipe dream. I am down at Bike Week in Myrtle Beach, having a great time and not really worried about updating a blog that only one person (albeit a very special person) reads. So until next week, nothing to see here, move along…
I picked up a new iron last week. After playing hacky sack with some of the insanely light irons on the shelf, I came across this bad boy: the Black and Decker Classic. I love the heft of this beast and how it looks almost exactly like the old GE iron I learned on.
Back home the heft proved it’s worth by beating the wrinkles out of a shirt I hadn’t successfully ironed, ever. The water reservoir indicator is tiny, you pretty much can only tell when it’s full. You’ll need a spray bottle if you’re used to hitting a button and having water magically mist out of the top of your iron. But for $25 bucks, I’ll take the simplicity. Plus an iron this heavy could come in handy if you get attacked by zombies or pandas.
Modern granny accessories? I’ve been saying for years that I am destined to use a granny chain for my glasses. I am constantly putting them down and forgetting where I left them. I have the same problem with my small scissors when I’m sewing. I came across a lanyard with a head saver made specifically for your scissors or tape measure (lost the link, wouldn’t ya know it) and was tempted to buy until it dawned on me: I have everything I need to make that and I didn’t pay a dime for any of it.
Work takes me to trade shows and conferences all the time. I have a drawer full of lanyards and other little swaggy trinkets from these events. I used an old lanyard from the last Share conference I spoke at, nice because it had a ring instead of a clip at the end and a “head saver” (retracting badge holder thingie) from a Linux show. Five minutes of rooting around in the detritus of my office and I am the height of techno-granny chic! Also, in the event of a zombie (or panda!) attack it’s convenient for a quick stabbity stabbity without having to rustle though everything on the table…
I picked up a necklace at Abercrombie and Fitch last year on a whim. I really liked it but paid way to much for it (it was around $30). I rationalized away my hard earned cash by convincing myself I would make more like it. It was then an investment in a reference design. My naturally cheap-o nature aside (c’mon, $30 bucks hurts!) I wear the thing every day, not so bad in the end. That constant wearing leads us to Luke. Luke, my youngest son, has been asking for a necklace like mine for a while. Yesterday he asked again and I was dire need of something to keep us (him!) occupied.
A quick trip to the craft store and $12 later, we have enough kit to make a pile of necklaces.
I have a pile of change I’ve brought home from foreign countries, that supplies the interesting coins. In this case Luke picked two coins from Aruba (I wouldn’t have gone with them, but he’s big on shiny). I used a cordless drill with a 5/64″ bit to make the holes. I just held them down by hand on a piece of wood and went slow (safety nuts feel free to roll your eyes in disgust). I used a larger drill bit to ream off the sharp edges.
To guess at the size of leather I needed, I measure my head size and the length of my necklace not including the knots. My head was about 4″ less in circumference than my necklace. I measured Lukes head and added 4″ for a guess at how long it needed to be. I don’t have a formula for how much the knots will take up. I just kind of guess.
The knots are pretty simple. I start by putting the ends together and tying an overhand knot (right over left and under, stop) in the loop. Then I tie the loose ends together with a double fisherman’s knot. The knots slide to adjust the size of the necklace. So it can go from a pendant to a choker in a flash.
I fastened the coins to the loop with a small metal loop (7mm jump ring) on the first go round (as seen in the pictures). The loops didn’t survive a day with the kids, so I fixed it with a heavy waxed thread (right out of the automatic awl).
The only real difference between the $30 upscale piece and my knock-off is the amount of oil on the leather. The original seems to have been oiled a bit and rounded. So while it was hard to move the knots at first on the original, the knockoff seems much harder to adjust. Hard to tell for sure now, because the original is so well broken in. I will have to talk to someone with a little better leather knowledge.
It’s four in the morning. I didn’t want to start with a nebulous no content post, but I’m still up. Just not really up for finding the usb cable for my camera. I’m a classic blogging disaster. I’ll post a bunch in a flurry of activity and then disappear under the avalanche of work or life obligations that take my attention away. I’m not going to bother taking any more time than I already have on tweaking or prettying up this space. It’s time for posts! Yeah, the unbridled ambition of the insomniac. That’s reliable.
Anyhoo… Here’s my plan, I’m going to post about whatever I’m working on. Sewing project, kid’s book report, jewelry, drawing, motorcycle, kernel code, cookies, dinner, whatever. So, pretty much unfocused ramblings. I should probably make myself post a certain number of times a week. Two would be safe, three should push me enough without killing me. This one doesn’t count. Mostly because I watched Two and a Half Men instead of finishing it in the five minutes it deserved.
Instead of filling up the blogspace with another unattended blog with a new name, I am repurposing the Wingnux name for this wtf am I doing blog. If I keep up on it, I will put something insightful here.